In this article we go through the whole process from creating a screen saver project to downloading and displaying images from network. All that in our favorite Swift lang. The project can be found on github.
Creating new project and adding initial Swift file
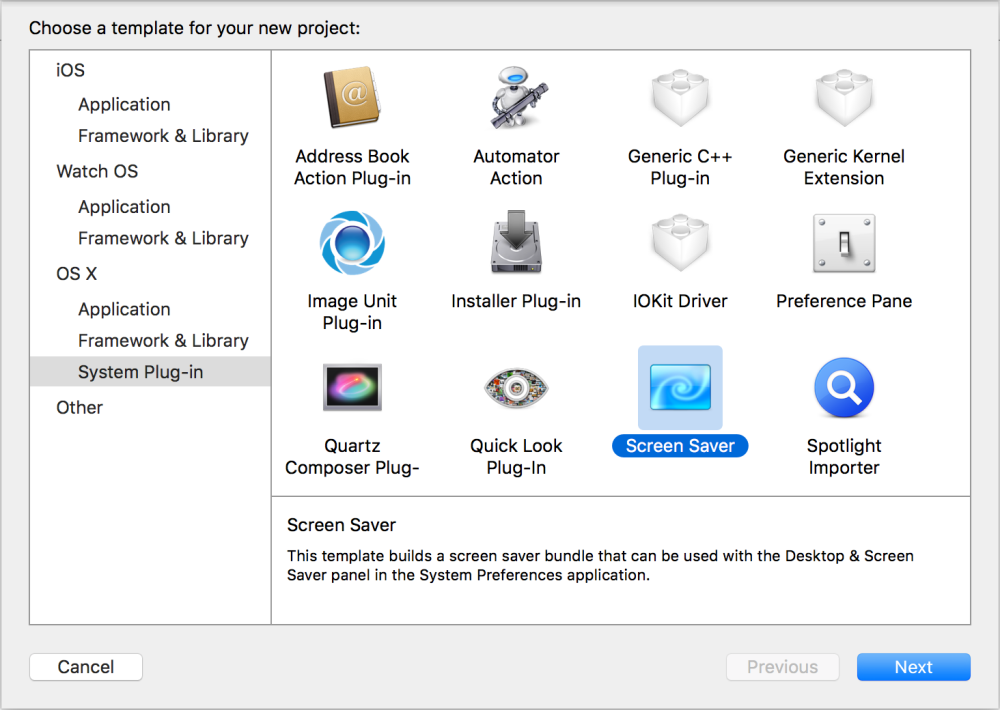
To start screen saver project in Xcode, select File -> New -> System Plug-In -> Screen Saver. I name the project ImageStream.

We have no opportunity to set Swift as our language and unfortunately what we see is good ‘ol objective-c code. (If you already are interested in the details of why all this code is here and what it does, take a look at Screen Saver Framework Reference form Apple.)
This file contains bidirectional Unicode text that may be interpreted or compiled differently than what appears below. To review, open the file in an editor that reveals hidden Unicode characters.
Learn more about bidirectional Unicode characters
| @interface ImageStreamView : ScreenSaverView | |
| @end |
Before we change anything lets try if the screen saver works, so that after changes we can always verify if the project is still running. To do that we need to first build the project (Cmd+B). Now lets find our .saver file and install it. The list of our projects is in Projects window (Window -> Projects).

With our project selected we can go to Derived Data folder and from there to Build -> Products -> Debug. To install double click .saver file. In the System Settings we can already preview our screen saver. For now it only displays black screen, but since we haven’t written a single line of code it is not bad. We have to convert our ScreenSaver class to Swift and this involves manual writing Swift subclass of ScreenSaverView. First we delete the objective-c file and then we need to create Swift replacement (File -> New -> File… -> Cocoa Class) The complete Swift file can be found on github.
This file contains bidirectional Unicode text that may be interpreted or compiled differently than what appears below. To review, open the file in an editor that reveals hidden Unicode characters.
Learn more about bidirectional Unicode characters
| class ImageStreamView: ScreenSaverView { | |
| override init?(frame: NSRect, isPreview: Bool) { | |
| super.init(frame: frame, isPreview: isPreview) | |
| } | |
| required init?(coder: NSCoder) { | |
| fatalError("init(coder:) has not been implemented") | |
| } | |
| override func startAnimation() { | |
| super.startAnimation() | |
| } | |
| override func stopAnimation() { | |
| super.stopAnimation() | |
| } | |
| override func drawRect(rect: NSRect) { | |
| super.drawRect(rect) | |
| } | |
| override func animateOneFrame() { | |
| } | |
| override func hasConfigureSheet() -> Bool { | |
| return false | |
| } | |
| override func configureSheet() -> NSWindow? { | |
| return nil | |
| } | |
| } |
Because we add Swift file to our project for the first time, XCode will ask if we want it to configure objective-c bridging header. At this point we don’t need it, so we can tell not to do it. We also need to set a Embedded Content Contains Swift Code flag in Build Settings to Yes. Now our project should build and again we should be able to install and test our ‘black screen’ screen saver.
EARLY Troubleshooting
Currently I use Xcode 7 beta 3 and OS X El Capitan beta as well. Because of that not everything goes smoothly. At some point I couldn’t see my screensaver working, but only a message from Apple that I should upgrade OS X to the newest version. A trick described on Apple Forum helped in that case. Removing anything beginning with ‘com.apple.screensaver‘ from ~/Library/Preferences/ByHost folder and restarting computer was enough to get back on track. Also sometimes screensaver does not refresh to new version. In that case removing old screen saver and restarting System Settings helps.
Presenting some content
Lets make our screensaver display some dynamic image from internet. Here’s a quick method that downloads an image and tells the view it needs to redraw itself.
This file contains bidirectional Unicode text that may be interpreted or compiled differently than what appears below. To review, open the file in an editor that reveals hidden Unicode characters.
Learn more about bidirectional Unicode characters
| func loadImage() { | |
| dispatch_async(dispatch_get_global_queue(DISPATCH_QUEUE_PRIORITY_DEFAULT, 0)) { | |
| let url = NSURL(string: "https://raw.githubusercontent.com/yomajkel/ImageStream/added-swift-image/assets/swift.png") | |
| let data = NSData(contentsOfURL: url!) | |
| if let data = data { | |
| self.image = NSImage(data: data) | |
| self.needsDisplay = true | |
| } | |
| } | |
| } |
We should also try to draw the image if it’s there, so we need to add some code to drawRect method.
This file contains bidirectional Unicode text that may be interpreted or compiled differently than what appears below. To review, open the file in an editor that reveals hidden Unicode characters.
Learn more about bidirectional Unicode characters
| override func drawRect(rect: NSRect) { | |
| if let image = image { | |
| let point = CGPoint(x: (frame.size.width – image.size.width) / 2, y: (frame.size.height – image.size.height) / 2) | |
| image.drawAtPoint(point, fromRect: NSZeroRect, operation: .CompositeSourceOver, fraction: 1) | |
| } | |
| } |
We should also have an image var and call loadImage() in initializer. The complete source of screensaver class can be found on github. Now building and installing our screensaver should display Swift logo on the screen. 
Debugging our screensaver
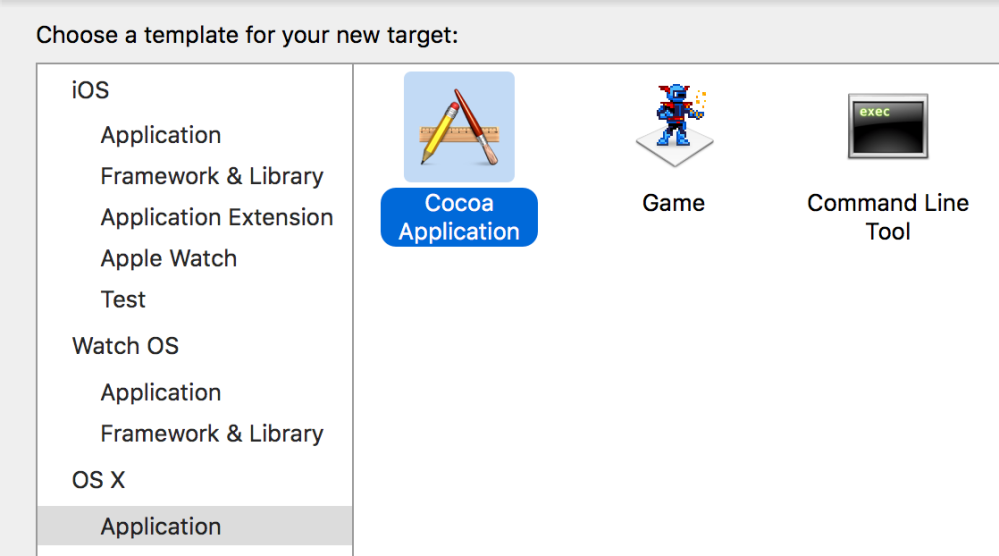
Most of the time things don’t really work like described in articles on the internet, so it’s good to know how to debug our screensaver project. The easiest way is to create an executable that will instantiate our subclass of ScreenSaverView. For that we create new target template.

We can uncheck Use Storyboard. Our focus is on new AppDelegate.swift file. Trying to add ImageStreamView as a variable in AppDelegate will result in unresolved identifier.
This file contains bidirectional Unicode text that may be interpreted or compiled differently than what appears below. To review, open the file in an editor that reveals hidden Unicode characters.
Learn more about bidirectional Unicode characters
| lazy var screenSaverView = ImageStreamView(frame: NSZeroRect, isPreview: false) |
We need to add it to this target’s Build Phases. Simply adding the view class in Compile Sources should be enough to resolve the problem. Our static screensaver does not require much code to be displayed, so we only need one variable and we need to override appliationDidFinishLaunching.
This file contains bidirectional Unicode text that may be interpreted or compiled differently than what appears below. To review, open the file in an editor that reveals hidden Unicode characters.
Learn more about bidirectional Unicode characters
| lazy var screenSaverView = ImageStreamView(frame: NSZeroRect, isPreview: false) | |
| func applicationDidFinishLaunching(aNotification: NSNotification) { | |
| if let screenSaverView = screenSaverView { | |
| screenSaverView.frame = window.contentView.bounds; | |
| window.contentView.addSubview(screenSaverView); | |
| } | |
| } |
If we select our new target and press Cmd+R our screen saver should run as an application and if we set some breakpoints in screensaver view they will be activated. This is a convenient way to debug our screen saver, but it will not run as a system plug-in and sometimes the devil is in the details. The article on match (section Debugging Tips) explains how to debug screen saver running as plug-in as well. You may also want to take a look at this stack overflow page.
Short Summary
So far we crafted a basic screensaver in Swift language. Stay tuned for part 2 where we will download more images and add some animations using Swift 2 language features.